Introduction
In the Client Software Login, the User ID number must be generated in combination with the Software Name (Client Name) and Member name for the shift transferred from Shift Match (Cascom). This User Id (or CUID) refers to a unique identifier associated with the member that ensures each shift detail is sent with this distinct identifier that helps to track or identify specific shifts.
In the Member App, when the member accepts the shift transferred from the Shift Match, the CUID for this shift is shared with the Shift Match (Cascom).
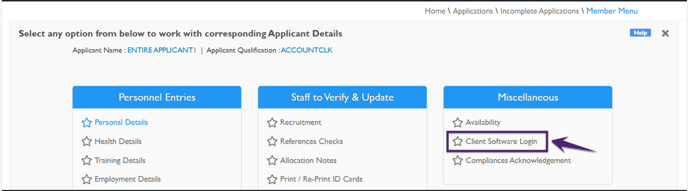
Click Client Software Login from the Member Menu, and the Client Software Login for Member opens
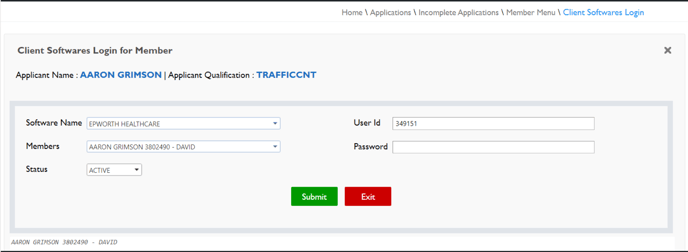
In the Client Software Login for Member page:
- Select the Software Name, Member
- On selecting the member name, the Member Name and Member’s Qualification are automatically populated at the top of the page
- Now, provide the valid User Id number.
Client Software Login for Member
To generate the Client Software Login for the Member:
⇒ Note that this User Id will be passed as the CUID for the member against the selected Software Name with all other relevant details.
-
Click Submit, and the message 'Request is successfully inserted' appears. The CUID is generated for the selected Software Name and Member.
External Software Integration
Before generating the User Id (or CUID) in the Client Software Login, the first step is to Add New Client Software as ‘CASCOM’ in the External Software Integration of the Member Master.
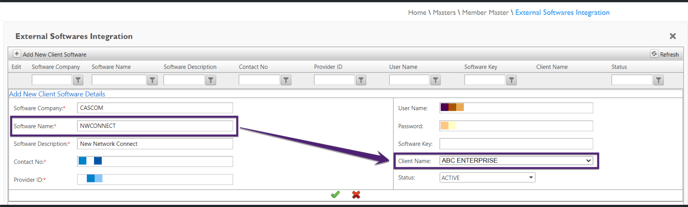
Add New Client Software
To Add New Client Software:
-
Click Masters → Member Master → External Softwares Integration
-
Click Add New Client Software

-
In the Add New Client Software Details, provide the Sofware Company (as CASCOM), Sofware Name, Software Description, Contact No., Provider ID, User Name, Password, and Client Name
-
The Software Name should be correctly mapped with the available list of Client Name
-
The Status should be Active
-
Click the tick icon, and the new client software is added.
-
⇒ Note that this newly added Software Name will appear in the Client Software Login page in the Software Name drop-down.
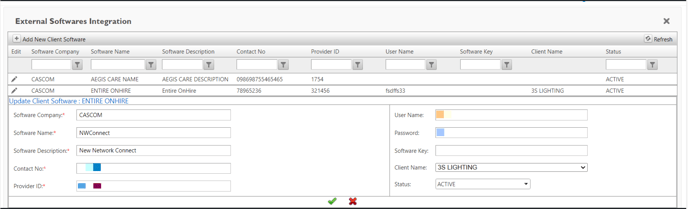
Edit New Client Software
You can edit the existing Client Software details. To edit the existing Client Software details:
-
Click the edit icon as shown in the figure below.

-
In the Update Client Software, update all the required details and click the tick icon.