
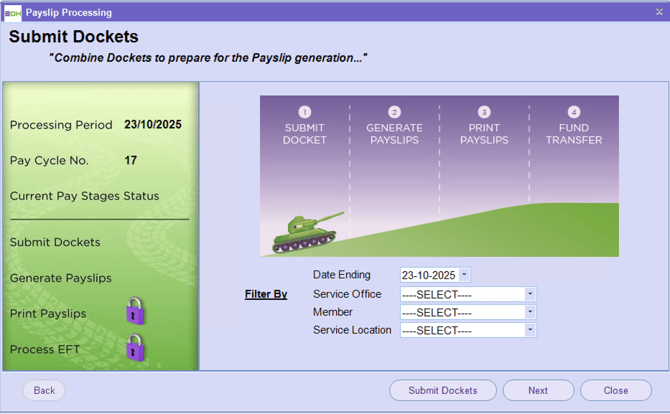
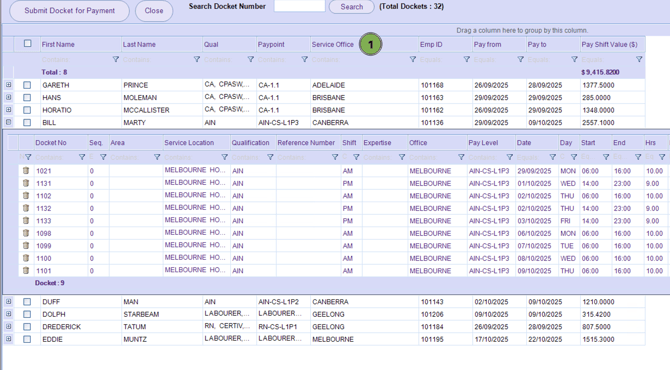
On clicking the ‘Submit Dockets’ button, the Submit Dockets Screen is displayed as can be seen below.
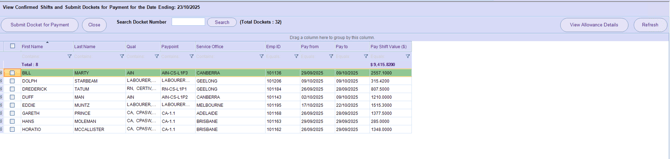
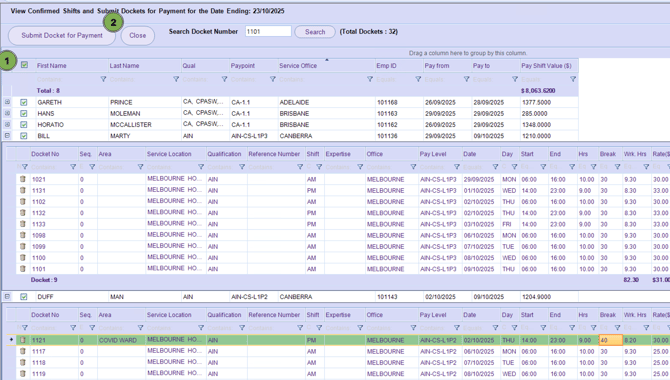
A list of members are displayed. These are the members who have had shifts confirmed since the last pay run. Each member is listed with a total pay shift value. This is the sum of all of their shifts in the pay period. There are several points to note on this screen:

-
Filter functionality at the top of each column allows the user to filter for certain members.
-
The column order may be changed to suit user preferences by dragging and dropping the column name to another position.
-
The sort order of each column may be changed by clicking on the column name.
-
-
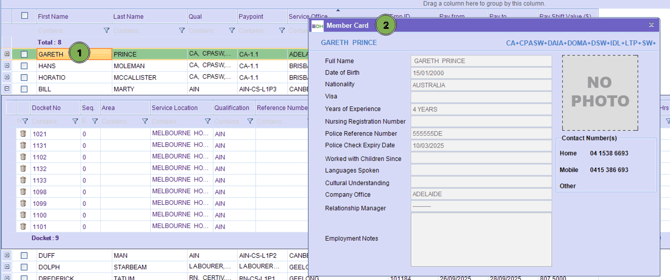
Clicking on the member’s First Name or Last Name in the list will display the Member Card Screen with all of the member’s details.
-
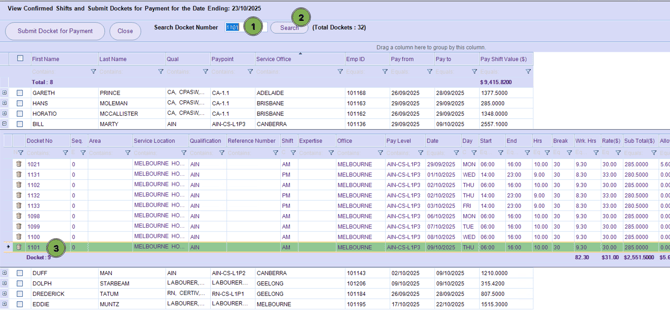
The ‘Search Docket Number’ field allows users to do a quick search for docket numbers within the listing of shifts on the screen.
-
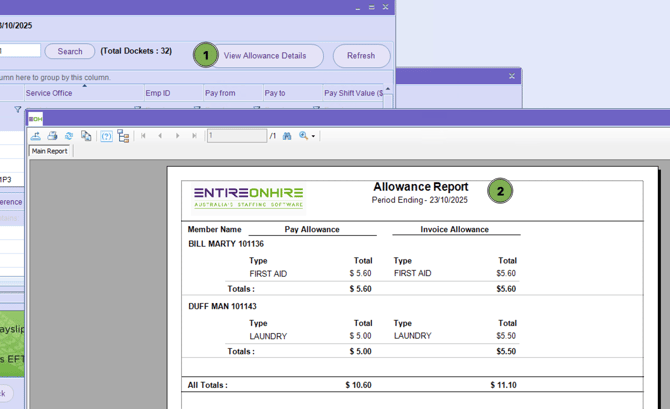
The ‘View Allowance Details’ button displays a summary of any allowances applied to the shifts in the listing. A sample is displayed below. We suggest exporting this prior to confirming all your shifts for the payrun as this is the only time this report is available.
-
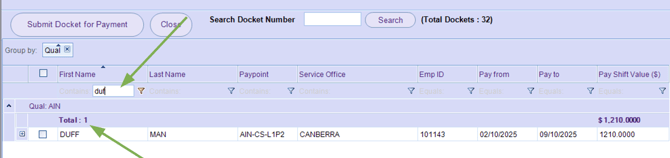
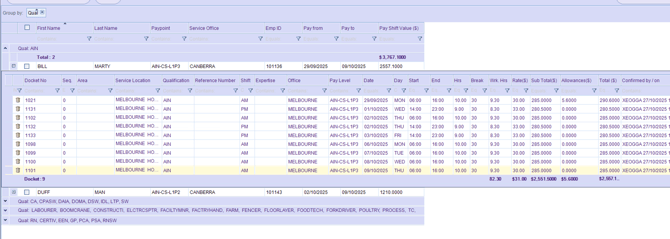
Clicking on the ‘+’ at the start of each row will display each of the member’s shifts, containing shift details and pay and allowance details.
-
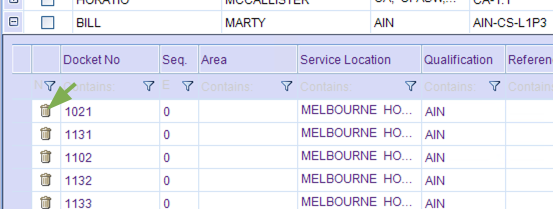
The trash bin symbol at the start of each row in the member’s expanded shift list allows shifts to be deleted from this stage of the pay run. This is used if an error exists in the shift details. Deleting the shift sends it back to the Confirm Shifts stage, so that it may be updated and confirmed once again.
-
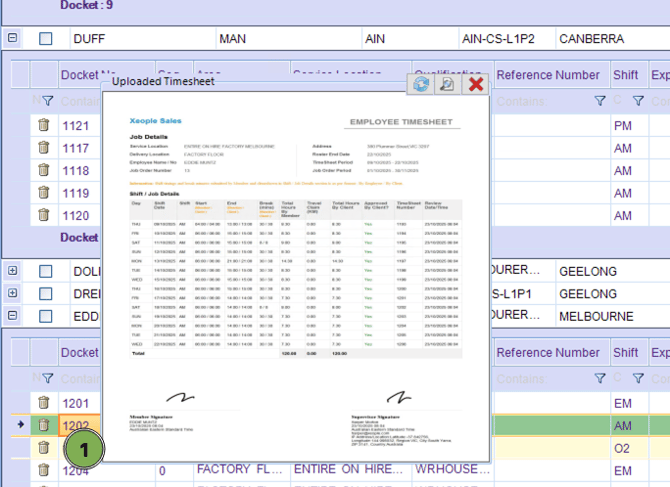
Hovering over the docket number in the member’s expanded shift list will display an image of the timesheet snap or the electronic timesheet (if these have been submitted to the system via the Member App or Staff App).
-
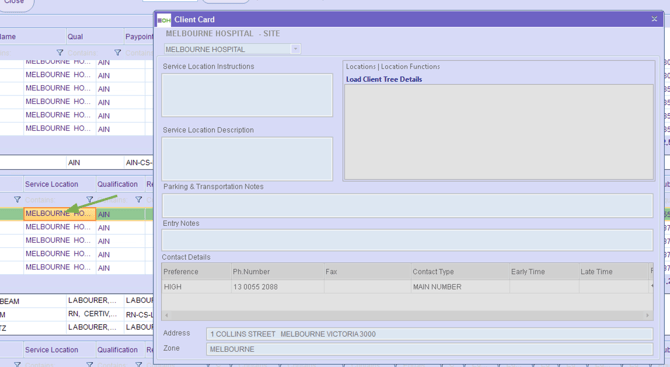
Clicking on the Service Location in the member’s expanded shift list will display the Client Card Screen with all of the client’s details.
-
In the member’s expanded shift list, the user may update certain fields as long as the corresponding invoice has not been raised.
These fields are Area (or ‘Delivery Location’ of the shift), Shift Type, Start Time, End Time and Break.
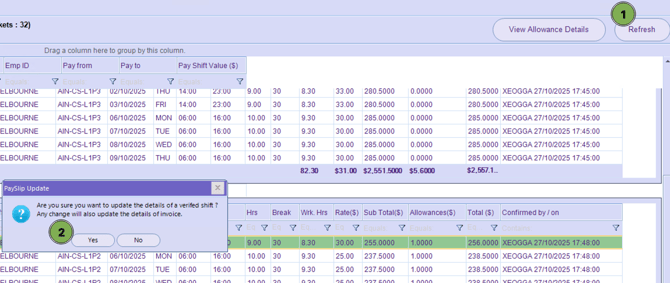
If these fields are updated, the ‘Refresh’ button should be clicked to save the changes. These changes will also be applied to the invoice component of the shift.
-
To process this stage of the pay run, follow these steps:
(a) Review shifts by expanding the list of each member’s shifts.

(b) If any errors are detected in the Area, Shift Type, Start Time, End Time or Break fields, update the fields and click on the ‘Refresh’ button to save the changes. If errors are detected in other fields, delete the shift (using the trash bin symbol) so that it may be reconfirmed again, as explained in section 2.1.1 Confirming a Basic Single Shift. Note that it will not be possible to delete the shift if the corresponding invoice has already been generated.
(c) Select the members that are to proceed into the next stage of the pay run by checking the checkbox next to each member’s name. Note that it is not possible to select specific shifts of the member. If the member is selected, then all shifts for the member will proceed to the next stage.
If all members are to be selected, then the checkbox in the header may be selected which automatically checks all member checkboxes.
Do not submit dockets for payment if your weekending date is incorrect, as this will lock the payroll period. Once locked, the period cannot be unlocked and will be greyed out.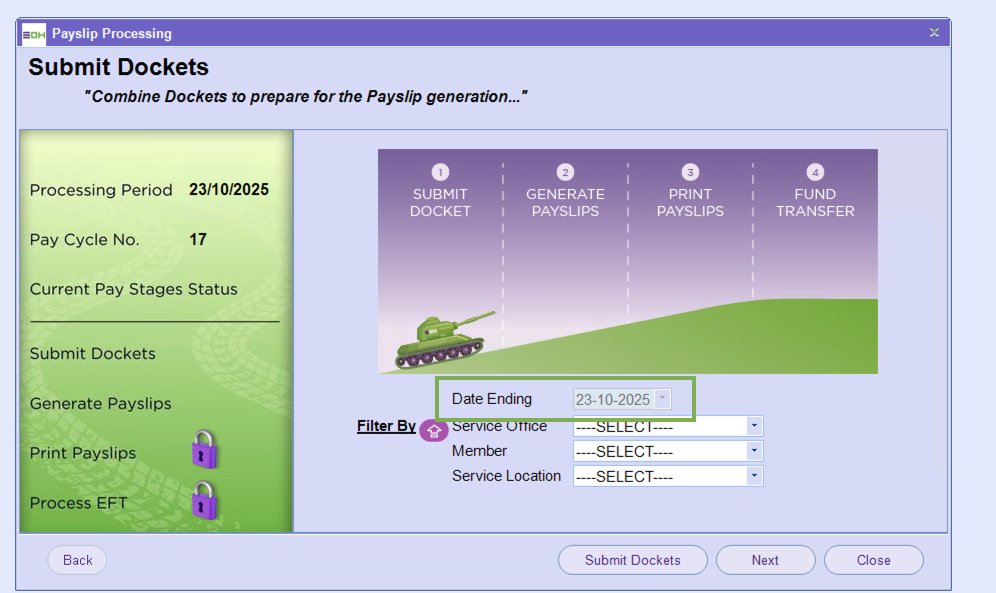
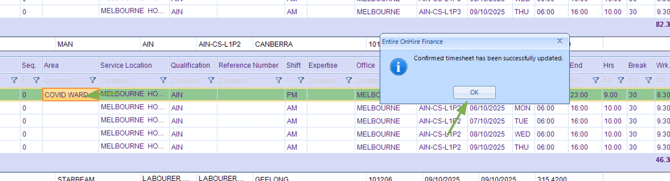
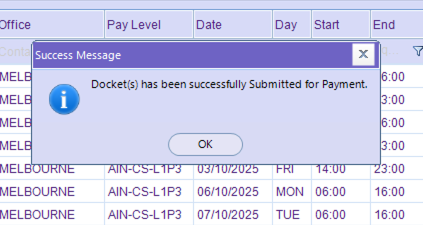
(d) Click on the ‘Submit Docket for Payment’ button and a confirmation message will be displayed as shown below. Click on OK of the confirmation message, then click the ‘Close’ button to close the screen.
(e) The Payslip Processing Summary Screen has been displayed once again. Click on the ‘Next’ button to move to the next stage of the pay run, Generate Payslips, as shown below.
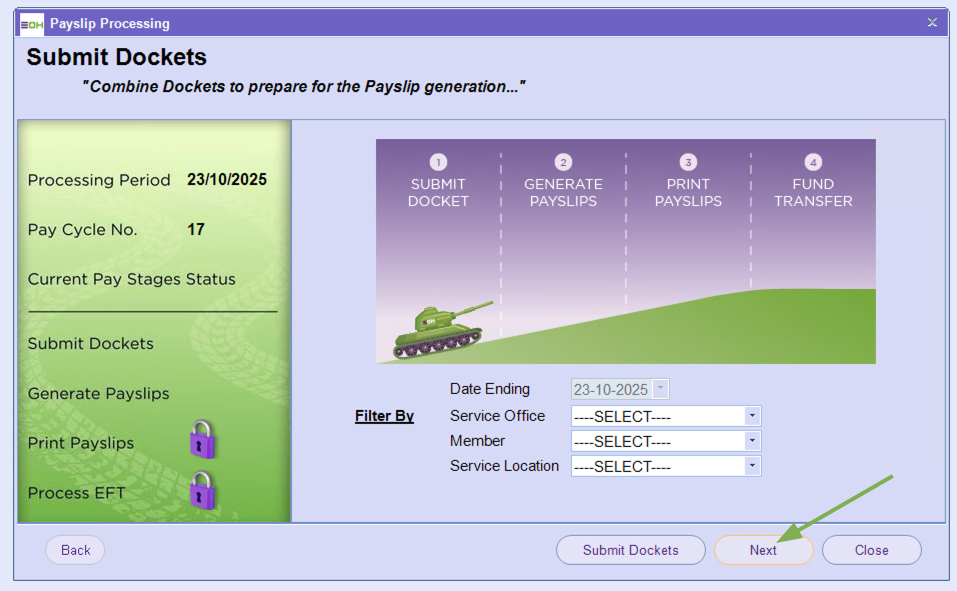
Next Step Generate Payslips