
Click Invoice
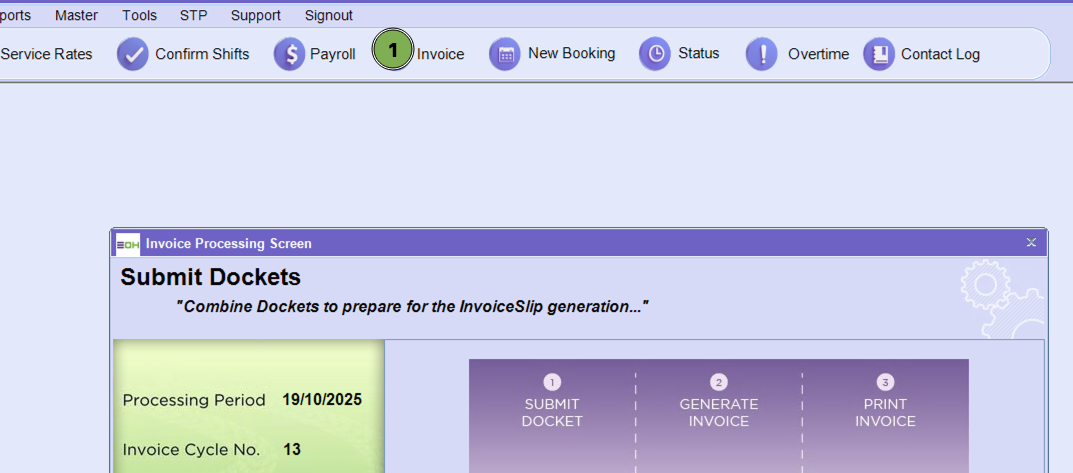
Once you update the date it will display the Invoice Processing Summary Screen.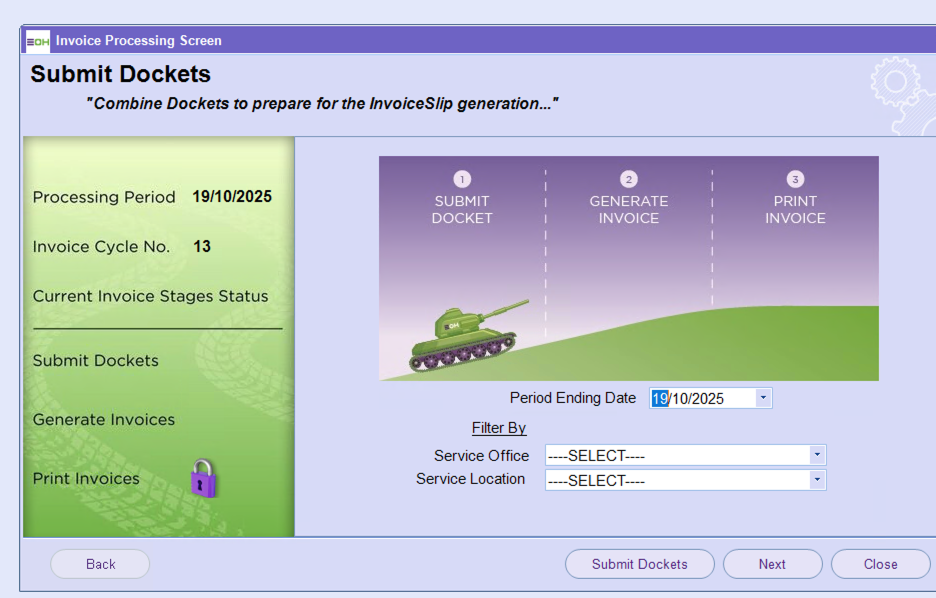
Hank the Tank indicates the current step of the invoice run. It will initially be sitting on the first step of the invoice run, the Submit Dockets step. Enter the week ending date into the ‘Invoice Processing Date’ field
The invoice run may be run for all confirmed shifts. If this is required, then the filter fields should be left as is. However, if the invoice run needs to be run for a smaller subset of shifts, the filters may be used to narrow the set. The filters may be used to narrow the set by ‘Service Office’ and/or ‘Service Location’.
Then click on ‘Submit Dockets’ to complete the first step of the invoice run.

To understand the Submit Dockets process click here
Important Note
The following sections provide instructions for completing the invoice run. Before you start the invoice run, check these important settings:
• Have you defined the standard message to be displayed on all invoices?
-
The standard message that is displayed on all invoices is defined in the ‘Invoice Instruction’ field in the Finance Portal at /Tools/Application Options/Payroll.
-
This message will be displayed for all invoices for all invoice runs until the message is deleted or updated.
• Have you defined the header text and footer text to appear on all invoices?
-
The header text that is displayed on all invoices is defined in the ‘Define Report Header’ field in the Finance Portal at /Tools/Application Options/Report Options.
-
The footer text that is displayed on all invoices is defined in the ‘Define Report Footer Contents’ field in the Finance Portal at /Tools/Application Options/Report Options.
-
The header and footer text will be displayed for all invoices for all invoice runs until the text is deleted or updated.
• Have you defined the email text for invoices to be emailed?
-
The email sender, subject, body text, and signature must all be defined for the email that the invoice is attached to.
-
These are defined in the Email Protocols Screen. To access this screen, go to /Invoice / Email Invoices menu, then click on the ‘Set Email Protocols’ button.
-
Click on the ‘Invoice’ radio button to enter or display the invoice text.