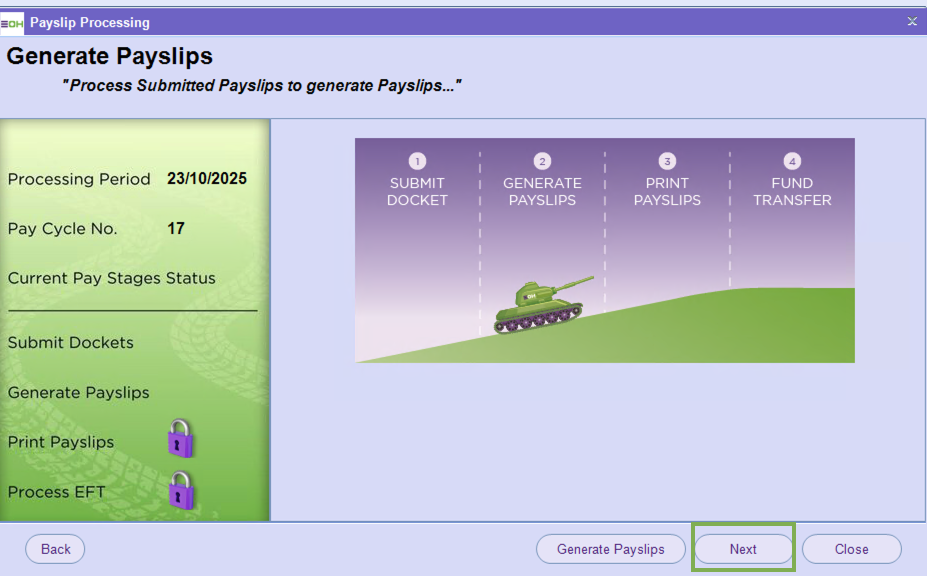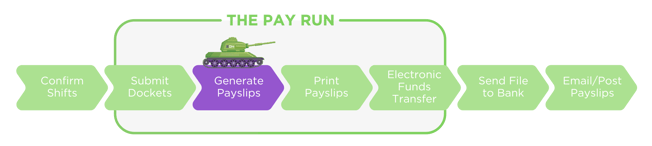
Hank the Tank now indicates that we are at the Generate Payslips step of the pay run.
This step is predominantly for the generation of payslips, as the name suggests, but it is also the step at which additions and deductions may be added to payslips, and tax and superannuation adjustments may be made.
Handy Hint
If more shifts have been subsequently confirmed, the user may click the ‘Back’ button, as shown above, to return to the Submit Docket step and submit the dockets for the newly confirmed shifts.
If no further shifts have been confirmed, the user will be prevented from opening the Submit Dockets screen.
Click on the ‘Generate Payslips’ button to open the Generate Payslips Screen displayed below.
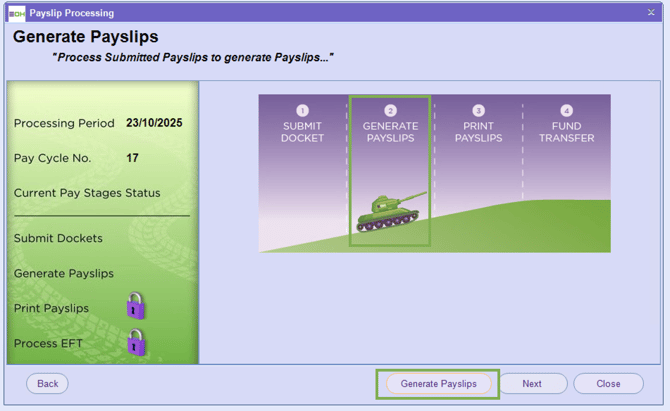
This will then load the following
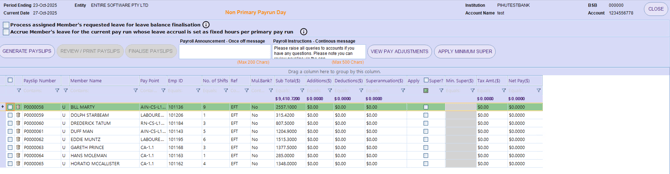
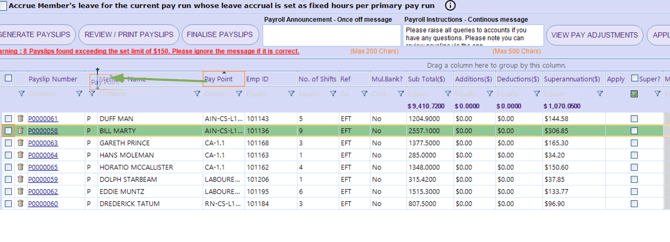
The members that were selected to proceed from the Submit Dockets stage can be seen listed on the screen. There are several points to note on this screen:
Filter functionality at the top of each column allows the user to filter for certain members.
-
The column order may be changed to suit user preferences by dragging and dropping the column name to another position

-
The sort order of each column may be changed by clicking on the column name.
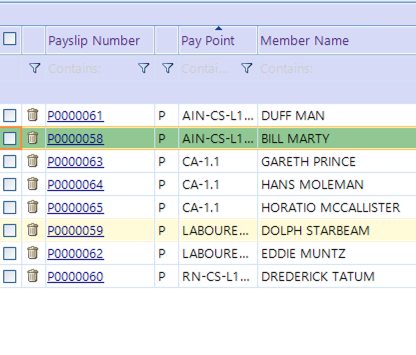
- A Payslip Number is generated for each member’s payslip only once you "

-
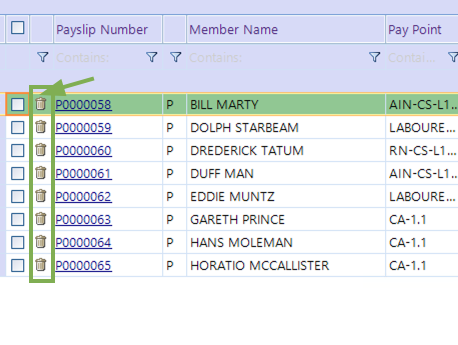
The trash bin symbol at the start of each row allows members to be deleted from this stage of the pay run. This is used if an error is detected in the row details. Deleting the member sends all the member’s shifts back to the Submit Dockets stage.
It may also be necessary to further delete the shifts from the Submit Dockets stage so that they can be updated and confirmed again in the earlier Confirm Shifts stage.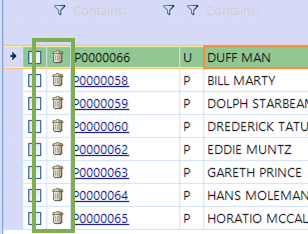
-
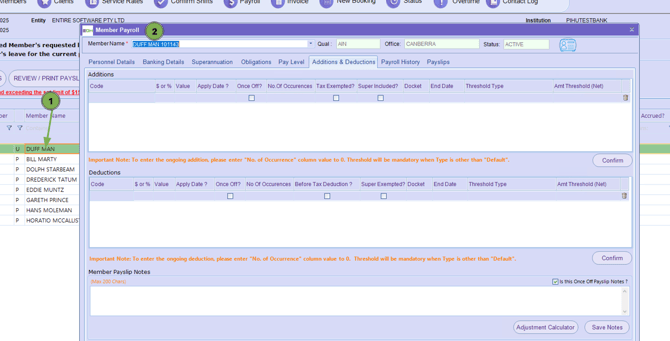
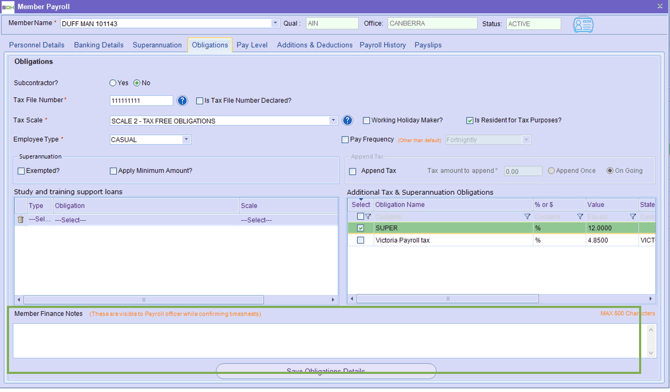
Member notes can also be seen by clicking on the Obligations tab of the Member Record, as shown below.
Clicking on the member’s name in the ‘Member Name’ column will display the member’s Member Record, as shown below.
-
-
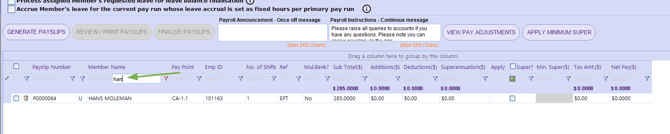
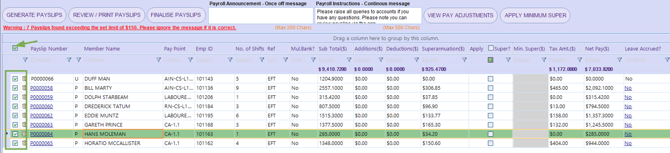
The EFT parameters can be seen in the upper right-hand corner of the screen, circled in red below

-
A one-time message can be specified in the Payroll Announcement field, circled in red below. This message will be displayed on all payslips for the current pay run only
A continuous message can be specified in the Payroll Instructions field, also circled in red below. This message will be displayed continuously on all payslips, for all pay runs, unless removed or updated. Note that this message may also be specified in the Finance Portal at / Tools / Application Options / Payroll.
To process this stage of the pay run, follow these steps:
(a) Review member pay details displayed on each row.

(b) If any errors are detected, delete the member so that the member’s shifts return to the Submit Dockets stage.
(c) Update the Payroll Announcement and Payroll Instructions fields as required.
(d) Select the members that are to proceed into the next stage of the pay run by checking the checkbox next to each member’s name. If all members are to be selected, then the checkbox in the header may be selected which automatically checks all member checkboxes.
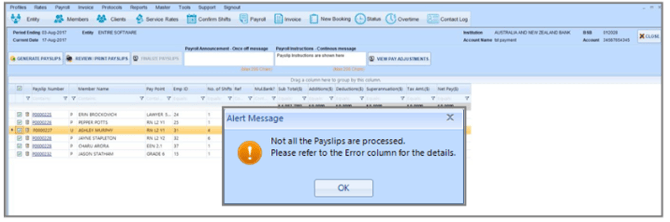
(e) Click on the ‘Generate Payslips’ button. If there are issues with the generation, an alert message will be displayed as in the example below.
(f) Click on the OK button of the alert message and expand the Error column to view the details, as shown below.
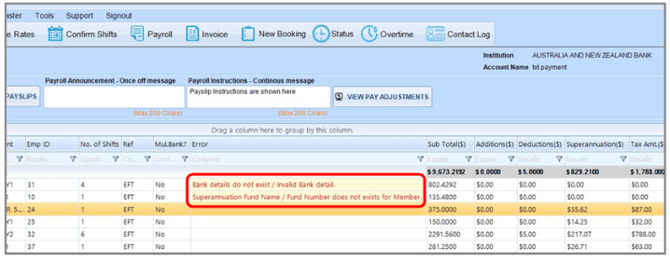
(g) In this example, member bank details and superannuation details are missing, and so the pay run cannot continue until the issues are rectified. In this case, the member records may be updated with the missing details and then the payslips generated again, or the affected members may be simply deleted from this pay run by using the trash bin icon. The latter will be done for this example.
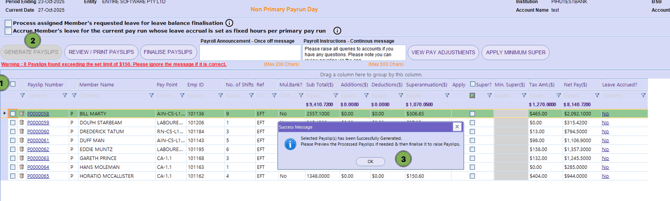
(h) If there are no issues with the payslip generation, a confirmation message will be displayed, as shown below, and the user is advised to preview and then finalise the payslips.
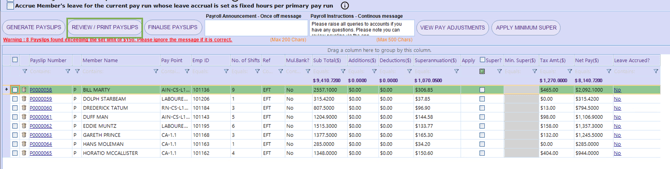
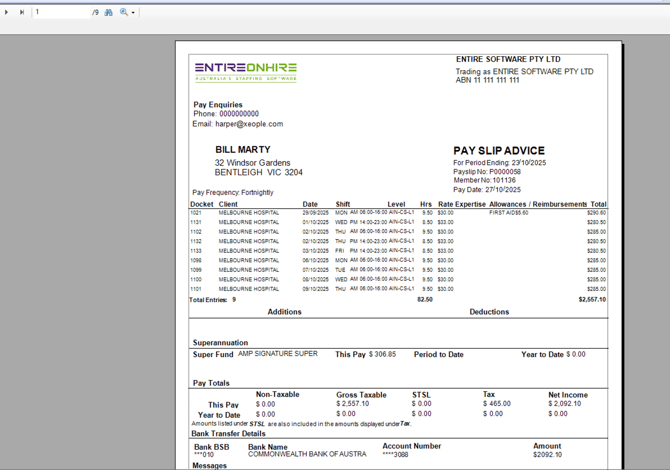
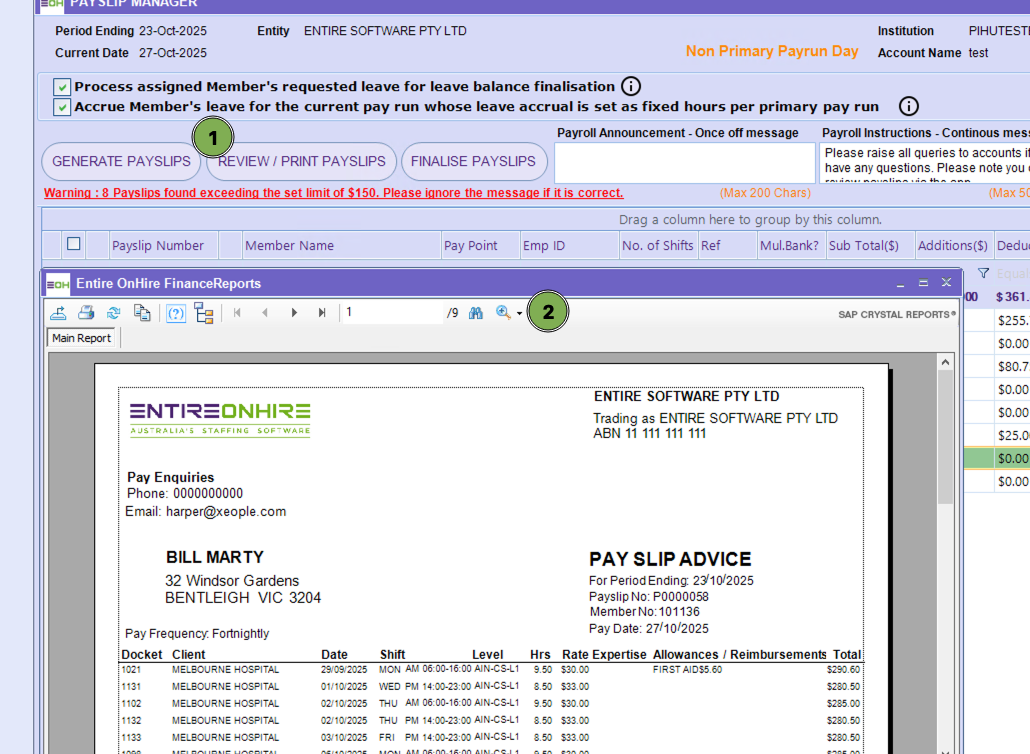
(i) Click on OK of the confirmation message and then click on the ’Review/Print Payslips’ button. A preview screen is then displayed, showing all sample payslips, as can be seen below.
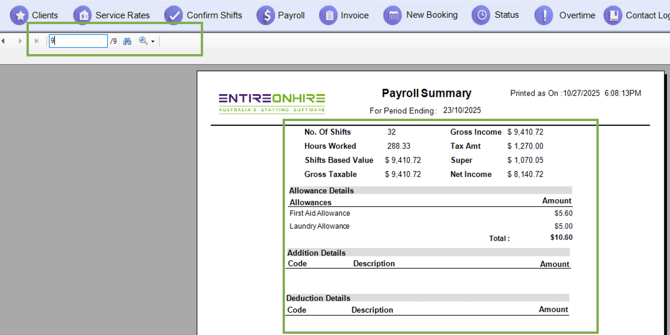
Payroll Summary Report Overview
This report provides a summary of payroll activity for the selected pay period.
Key Details Displayed:
-
Period Ending:
Displays the end date of the payroll period (e.g., 23/10/2025). -
No. of Shifts:
The total number of shifts worked during the period (e.g., 32 shifts). -
Hours Worked:
Total hours recorded across all shifts (e.g., 288.33 hours). -
Shifts Based Value:
The total value of all shifts before tax and deductions (e.g., $9,410.72). -
Gross Taxable:
Total taxable income before any deductions (matches shifts based value). -
Gross Income:
The total income before tax and other deductions (e.g., $9,410.72). -
Tax Amount:
The total tax withheld for the period (e.g., $1,270.00). -
Superannuation (Super):
The total employer super contribution (e.g., $1,070.05). -
Net Income:
The employee’s take-home pay after tax and deductions (e.g., $8,140.72).
Additional Sections
-
Allowance Details:
Lists all allowances applied during the period, such as:-
First Aid Allowance – $5.60
-
Laundry Allowance – $5.00
-
Total Allowances: $10.60
-
-
Addition Details:
Displays any extra payments or adjustments (none listed in this example). -
Deduction Details:
Displays any deductions other than tax (none listed in this example).
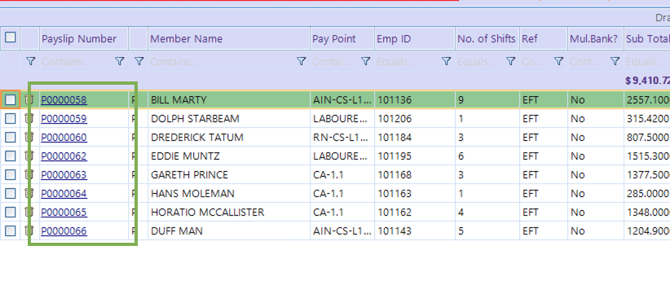
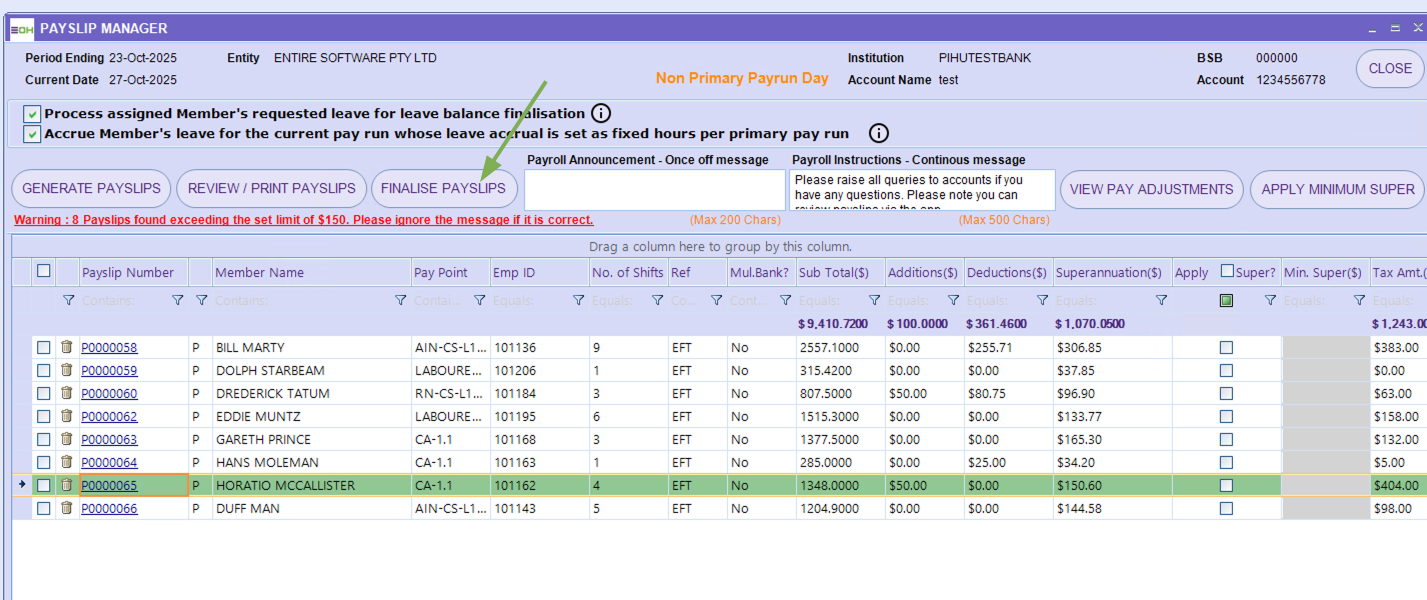
(j) Close the payslip preview screen and the Generate Payslips Screen is displayed once again. Note that each of the payslip numbers now has a hyperlink, as circled below. - Review the end of the article.
(k) If there are no further updates to be made to the payslips, then the payslips may be finalised by clicking the ‘Finalize Payslips’ button.

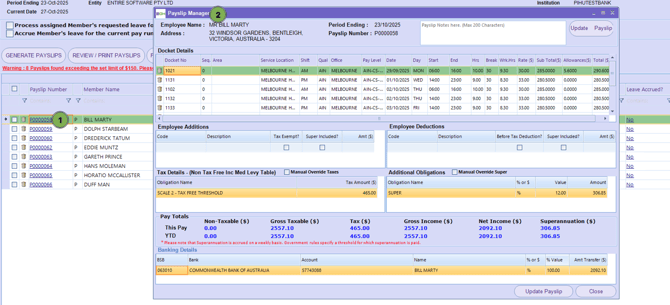
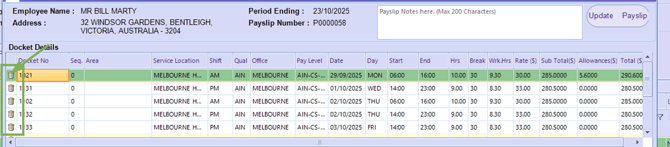
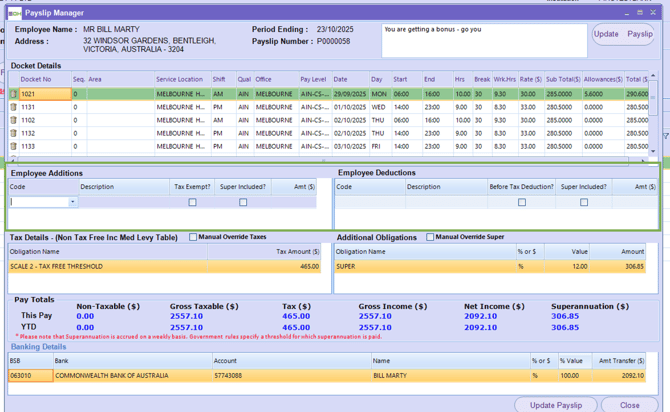
If further updates are required, each individual payslip may be updated by clicking on the Payslip Number hyperlink. This opens the Payslip Manager Screen.
From this screen, the user may change the display of shifts on the screen, delete specific shifts from the payslip, add a payslip-specific message, add an addition, add a deduction, adjust the tax amount and adjust the superannuation amount. These are explained below:
Payslip Manager – Changing On-Screen Shift Display
As with other screens, the user may change the way shifts are displayed on the screen. The column order may be changed to suit user preferences by dragging and dropping the column name to another position, and the sort order of each column may be changed by clicking on the column name.
Payslip Manager – Deleting Specific Shifts from the Payslip
The trash bin symbol at the start of each row allows specific shifts to be deleted from the payslip. This is used if an error is detected in the row details or if the shift is not to be included in the current pay run. Using this feature will send the shift back to the Submit Dockets stage. From there the shift may be processed again in the Submit Dockets stage, deleted again so it is sent further back to the Confirm Shifts stage for updating, or may be left to sit in the Submit Dockets stage to be processed in a subsequent pay run.
Note that if the trash bin symbol is used from the previous Generate Payslip Screen, all of the member’s shifts are deleted, but if it is used from the Payslip Manager Screen, then specific shifts may be deleted one at a time.
Note also that the user will not be permitted to delete specific shifts in the Payslip Manager Screen if the corresponding invoices have already been generated.
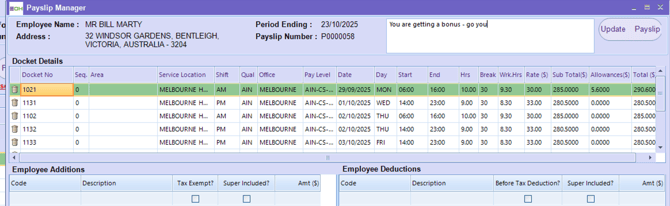
Payslip Manager – Adding a Payslip-Specific Message
In addition to the Payroll Announcement and the Payroll Instructions messages (which apply to all payslips), it is sometimes necessary to add a message to a payslip that applies only to a single payslip. Such messages can be added to the message field, circled in red below. If there are multiple shifts listed in the payslip, and the message relates to a specific shift, then the docket number of the shift may be referred to, to identify the shift, as in the example below.
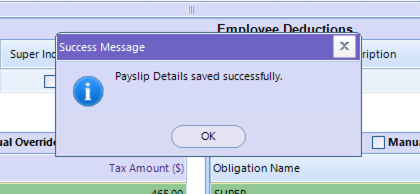
Once the message has been entered, click on the ‘Update Payslip’ button to save the update and the Payslip Manager Screen will close.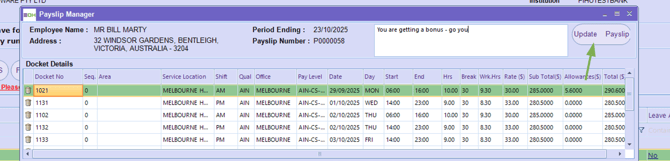
Handy Hint
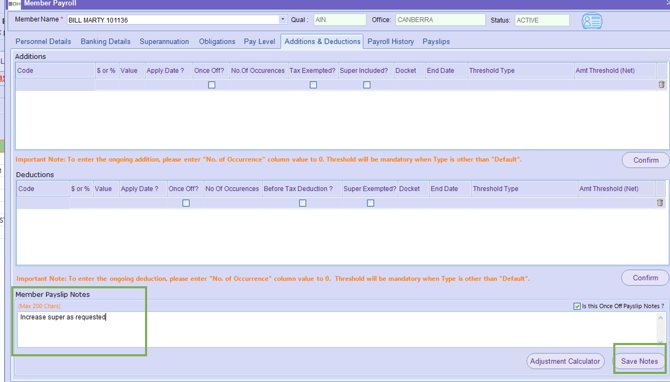
Payslip Notes may be added to the payslip using the Payslip Manager Screen, as described above, but they may also be added to the member’s Member Record.
When added to the Member Record, the notes are specified as being a one-time occurrence, or for multiple occurrences.
If it is a one-time occurrence, it will be added to the payslip in the next applicable pay run.
If it is for multiple occurrences, it will be added to multiple payslips for the member over multiple pay runs.
The Additions & Deductions tab of the Member Record is shown below, displaying the Member Payslip Notes field circled in green
Payslip Manager – Adding an Addition or Deduction
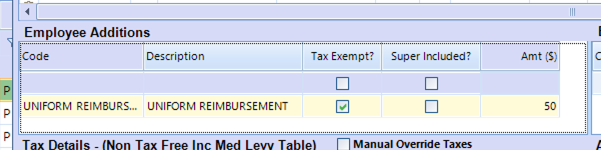
To add an addition, select the relevant Payslip Number hyperlink to open the Payslip Manager Screen. In the Employee Additions section, click into the Code field, choose the appropriate addition from the available list, then tab to the Amount field and enter the required value. The fields for Description, Tax Exemption, and Super status will automatically populate based on the configuration in the Additions and Deductions Master. Please refer to the highlighted area below. In this example, a meal allowance is being added to the payslip.
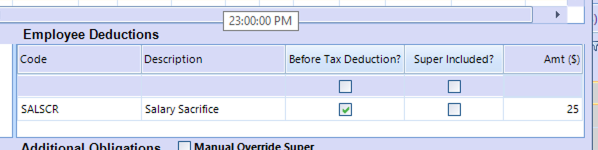
To add a deduction, follow the same process: select the Payslip Number hyperlink to open the Payslip Manager Screen, navigate to the Code field under Employee Deductions, select the necessary deduction from the list, and move to the Amount field to input the value. As with additions, the Description, Tax Exemption, and Super status will auto-fill according to the details in the Additions and Deductions Master. Refer to the highlighted section below. In this case, a Salary Sacifice deduction is being applied to the payslip.
Handy Hint
Additions may be added to the payslip using the Payslip Manager Screen, as described above, but they may also be added to the member’s Member Record.
When added to the Member Record, the addition is specified as being a one-time occurrence, or for multiple occurrences.
If it is a one-time occurrence, it will be added to the payslip in the next applicable pay run.
If it is for multiple occurrences, it will be added to multiple payslips over multiple pay runs.
The Additions and Deductions sections of the Member Record are shown below, displaying a Child Support Deduction

Click on the ‘Update Payslip’ button to save the deduction and the Payslip Manager Screen will close.
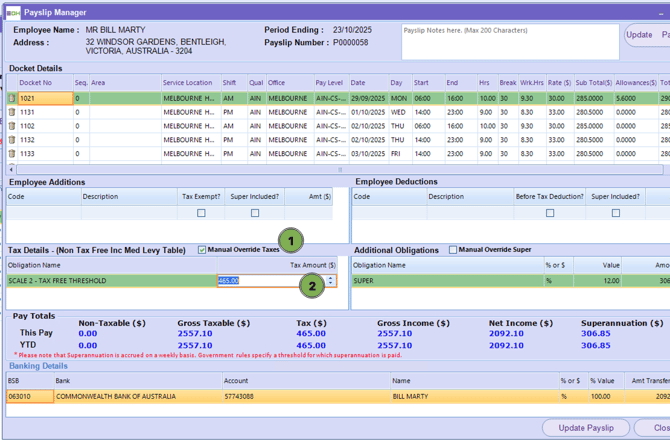
Payslip Manager – Adjusting a Tax Amount
Member tax scales are specified on Member Records, and the system will calculate member tax based on these scales, however, members may request adjustments to the amount of tax that is actually taken out of their pay. To adjust the tax amount on a payslip, click on a Payslip Number hyperlink to open the Payslip Manager Screen, and check the ‘Manual Override Taxes’ checkbox in the Tax Details section.
Then click into the Tax Amount field. The calculated amount will default but can be adjusted to the desired amount. Refer to the circled section below. Click on the ‘Update Payslip’ button to save the tax amount changes and the Payslip Manager Screen will close.
Handy Hint
Tax may be adjusted using the Payslip Manager Screen, as described above, but it may also be adjusted on the member’s Member Record.
Additional amounts of tax may be taken out by specifying the amount of tax to be appended. Furthermore, the appended tax may be applied once or on an ongoing basis.
The Obligations tab of the Member Record is shown below, displaying the Append Tax section circled in green.

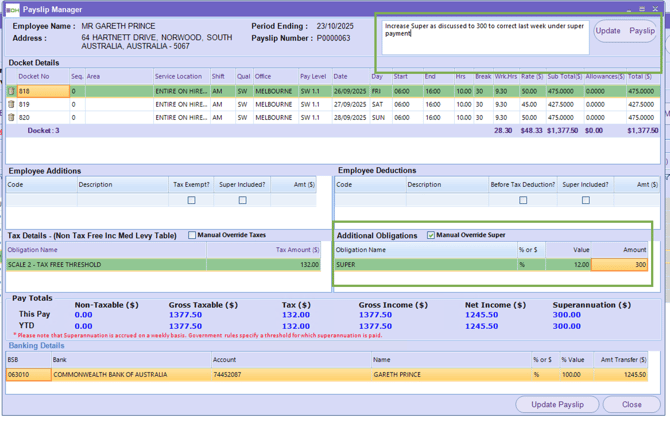
Payslip Manager – Adjusting Superannuation Amount
Superannuation is calculated on each payslip, based on the Superannuation settings within the system. However, members may request adjustments to the amount of superannuation that is actually taken out of their pay. To adjust the superannuation amount on a payslip, click on a Payslip Number hyperlink to open the Payslip Manager Screen, and check the ‘Manual Override Super’ checkbox in the Additional Obligations section. Then click into the Amount field. The calculated amount will default but can be adjusted to the desired amount. Refer to the circled section below. Click on the ‘Update Payslip’ button to save the superannuation amount changes and the Payslip Manager Screen will close.
Handy Hint
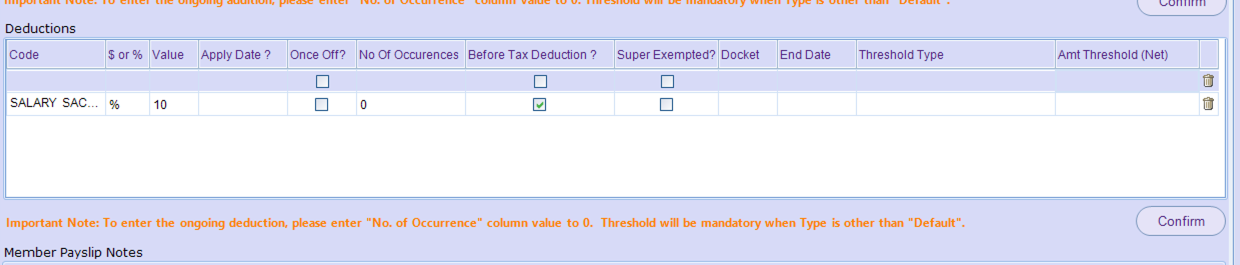
The superannuation amount may be adjusted in the Additional Obligations section of the Payslip Manager Screen (as described above), but it may also be applied as a deduction on the same Payslip Manager Screen, or as a deduction on the member’s Member Record.
This deduction must use the code ‘SALSCR’, indicating that the deduction is a Salary Sacrifice (employee contribution) deduction.
If the member wants the additional superannuation contributions to be regular and ongoing, the most appropriate method is to set up this deduction on the member’s Member Record.
Refer to the Payslip Manager – Adding a Deduction section above for details on how to add a deduction.
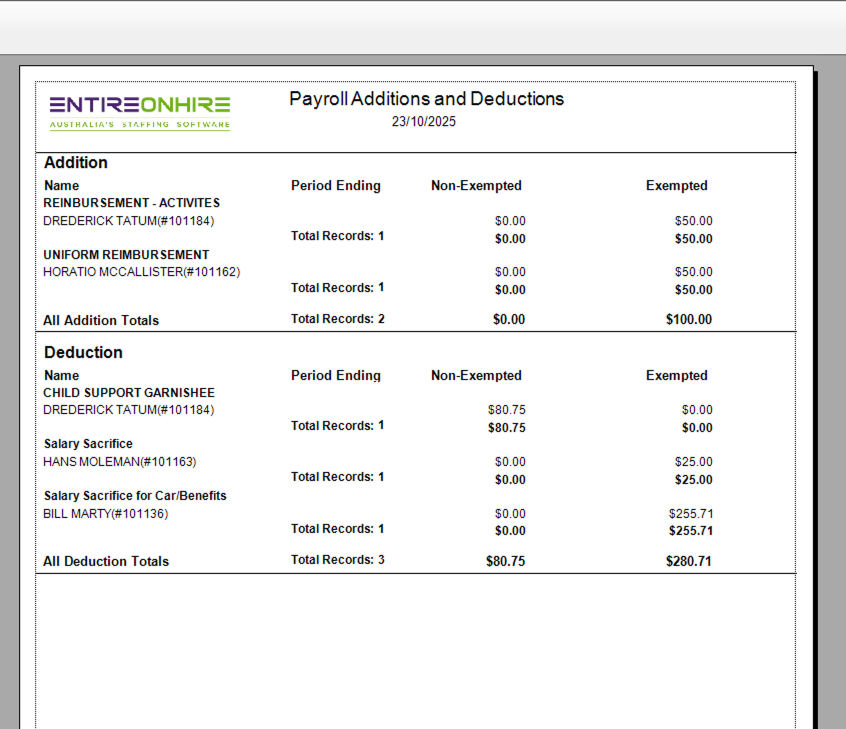
(a) Once all updates have been made in the Payslip Manager, click on the ‘View Pay Adjustments’ button to review the additions and deductions that have been added. A report will then be displayed. A sample of this report is shown below.
(l) As additions and deductions have been added, the payslips previewed earlier will now be different.
Click on the ‘Review/Print Payslips’ button once again to preview the updated payslips.
Important Note
If updates are made in the Payslip Manager Screen, these updates will be automatically reflected in the payslips (and this can be seen by previewing the payslips as suggested above).
However, if an update is made to the Member Record (which is accessed by clicking on the member name), then the update is not automatically reflected in the payslip. The payslip must be generated again for the update to take effect.
This will be evident as the hyperlink will no longer be present on the Payslip Number (suggesting that a payslip has not been generated yet).
To generate the payslip again, check the checkbox at the start of the member row and click on the ‘Generate Payslip’ button.
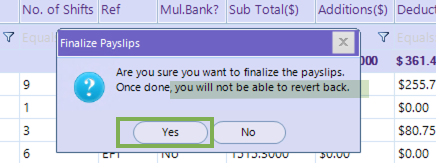
(m) Once all updates have been made, and payslips have been previewed, click on the ‘Finalize Payslips’ button.
(n) A confirmation message is displayed to confirm the user intends to finalize the payslips. Click on the ‘Yes’ button.
(P) The user is then notified that the payslips have been successfully finalized and instructed to close the screen and create an email batch to send payslips to members, as can be seen below.
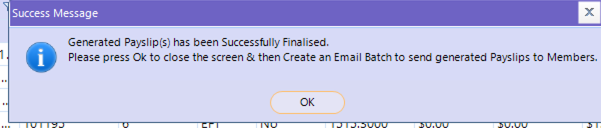
(q) Click on OK of the confirmation message. The Payslip Processing Summary Screen is displayed once again. Click on the ‘Next’ button to move to the next stage of the pay run, Print Payslips, as shown below.