
The Status Master defines all shift statuses used in the allocation workflow. These statuses describe the exact stage a shift is in and guide agencies, clients, and members through the allocation process.
A shift status shows what is happening with a shift at any moment—for example, whether it is newly created, open for acceptance, assigned, confirmed, cancelled, or still unfilled.
Shift statuses ensure smooth workflow by:
- Helping the right user take the next required action (e.g., member accepts, client confirms, agency updates).
- Logging every status change with date and time for accurate tracking and accountability.
To configure shift status in the master data, follow the steps below:
- Click on Masters.
- Select Allocation Masters and click on the Allocation Status.

Masters – Allocation Master - Allocation Status
- All Reason Groups are system-defined and cannot be added or removed.
- Click the Pencil button to edit the name of the Reason Group – Shift and Status. If you set a status to Inactive, any shift‑related status linked to it will no longer appear in the Status drop‑down on the Client Allocation screen.
- Click on (>) placed in front of Shift, you will see the list of all statuses.
- Click (+) to add a new reason status.
- Enter a unique status name.
- Choose the Text and Background colours for the status.
- Enter the Points and set the Display sequence.
The Display sequence controls the order in which the status appears in Status drop‑down on the Client Allocation screen.
- Click the green tick ( ) to save the new status or use the red cross to cancel.
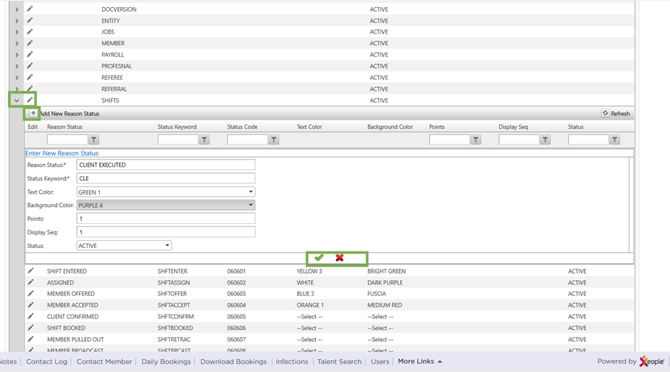
Allocation Status – Add/Edit Status - Save
- Click the Pencil button to update the status details.
-
Once you save a status, it is automatically reflected in the Status drop-down on the Client Allocation screen.
-
Any action you perform—whether through the Header - Action Panel or by directly selecting a shift and updating its status—will immediately update the shift status across the system.
-
You do not need to memorise the conditions or rules for each shift status. The system is designed with built-in alerts and indicators that guide you by showing which status transitions are allowed. This ensures you can easily identify which shifts can be updated and what statuses are applicable.
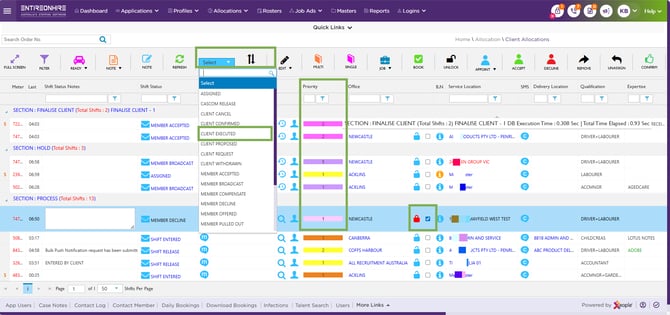
Client Allocation – Status – Added
-
Similarly, rosters use EOH – Client Allocation as its data source, so all shifts appear in the calendar view on the roster screen. Each shift clearly displays its status with the assigned text and background colours set in the masters.
- Any action performed through the Shift Action Bar—which appears when a shift is selected—will update the shift status in the Card View.
Recommend Reading: How shift status is updated via the shift card, click here: Shift Action Bar – Actions.
- Clicking on the status in the Calendar View opens the Shift Log pop-up.
Any status update you make here automatically syncs back to the source (EOH).
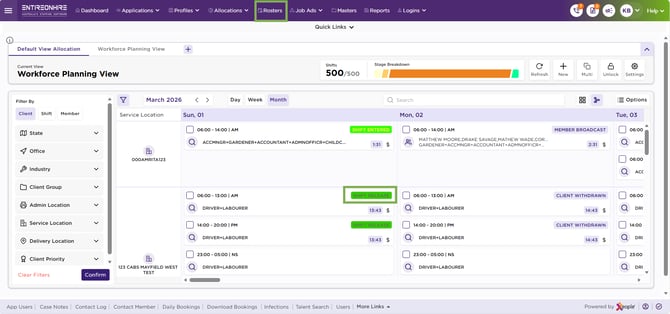
Rosters – Calendar View