
Credit and Debit notes can be created to amend over or undercharged amounts in the Client's invoice after finalization. Follow the steps below to create Credit/Debit notes:
Step 1: Select Invoice > Credit / Debit Notes.
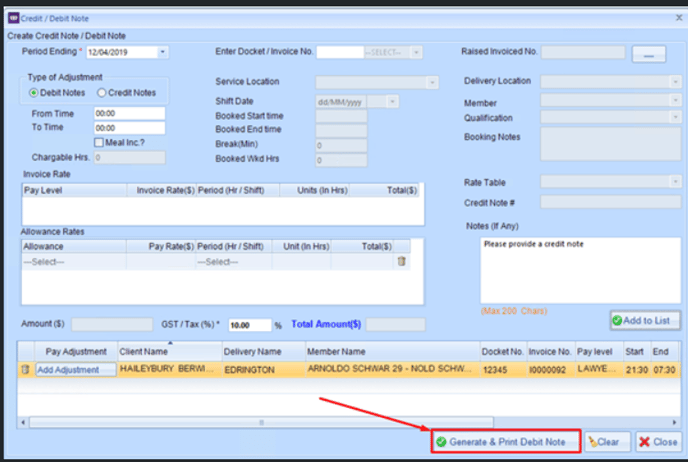
Step 2: Select the Period Ending Date. Ensure it is set for the next week ending date to be processed, not the week ending of the original docket.
Step 3: Enter Docket/Invoice Number. If the Credit/Debit applies to the total invoice, enter the invoice number. If it applies to a specific docket, enter the docket number. If a Docket number is for a shift with a split, load the available parts to select the component of the shift that the Credit/Debit note needs to be applied.
Step 4: Once you have entered a docket number or invoice number, select Tab or click your mouse anywhere on the screen to populate the matching data of the docket for ease of entry.
Step 5: Select the Type of Adjustment:
- Credit: Used when you have overcharged a client and wish to provide a credit to what the customer owes.
- Debit: Used when you have undercharged the client and wish to formally request a credit note.

Step 6: Make the Required adjustments. This can be in the invoice rate area for rate/hour changes or in the allowance area if it was an allowance change.

Step 7: Add notes describing the adjustment for the client to see on Credit/Debit note (optional).
Step 8: Select Add to list. 
Once Credit/Debit is added in the list, you will see it appear below.
These steps allow you to make adjustments to invoices, whether overcharged or undercharged, ensuring accurate financial transactions with clients.