Introduction
The XeopleSign Phase 2 is the enhanced version of the XeopleSign Phase 1. The major enhancements in this version include Document Mapping, XeopleSign Authorisation, the addition of a new User Type as a Professional, and share documents with professionals.
Document Mapping facilitates to map the XeopleSign documents with the Entire OnHire documents. The XeopleSign Authorisation helps to setup access to the XeopleSign Dashboard for the Authorised Users.
Click the link to visit the XeopleSign Phase 1 document ![]() XeopleSign - Phase 1.
XeopleSign - Phase 1.
XeopleSign Authorization
Access to the XeopleSign Dashboard is managed by the Job Boards Master of the Entire OnHire application. You need to setup the XeopleSign Job board with the correct API details and add authorised users to the XeopleSign Job Boards Master.
XeopleSign Job Board
To access the XeopleSign Dashboard, the XeopleSign Job Board should exist in the Job Boards Master as shown in the figure below. The XeopleSign Job Board detail includes the Job Board Name, Job Board Description, API Key, API Secret Key, Entire API, and Status.
The access to the XeopleSign Dashboard is authenticated by providing the valid API Key and API Secret Key.

XeopleSign Job Board Validations
The XeopleSign Job Board validations are placed to identify and fix the missing details to setup the XeopleSign Dashboard. On clicking the XeopleSign Dashboard, an Alert message is displayed, read the message carefully and click ‘Manage Configuration in Job Board Master’ to setup XeopleSign successfully.
Case 1
-
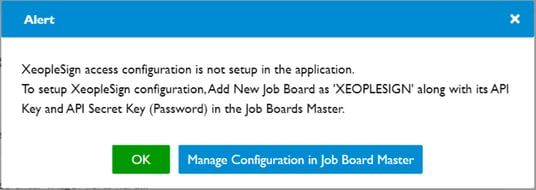
In case the XeopleSign Job Board is not added to the Job Boards Master, an Alert message is displayed as ‘XeopleSign access configuration is not setup in the application. To setup XeopleSign configuration, Add New Job Board as 'XEOPLESIGN' along with its API Key and API Secret Key (Password) in the Job Boards Master.’
-
To configure, click the Manage Configuration in Job Board Master and add a new Job Board as ‘XEOPLESIGN’ along with its appropriate API Key and API Secret Key
Case 2
-
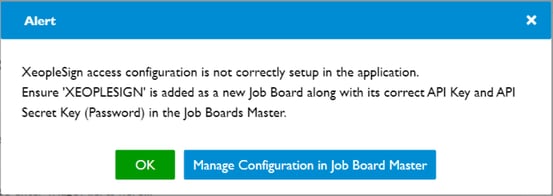
In case the XeopleSign Job Board details are not correctly setup in the Job Boards Master, an Alert message is displayed as ‘XeopleSign access configuration is not correctly setup in the application. Ensure 'XEOPLESIGN' is added as a new Job Board along with its correct API Key and API Secret Key (Password) in the Job Boards Master.’
-
To configure, click the Manage Configuration in Job Board Master and verify that the XeopleSign job Board is correctly setup along with its correct API Key and API Secret Key
Case 3
-
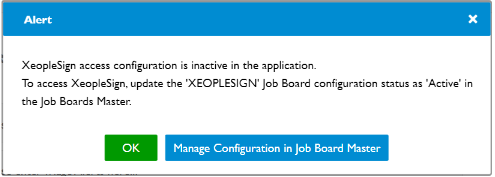
In case the XeopleSign Job Board Status is set to inactive in the Job Boards Master, an Alert message is displayed as ‘XeopleSign access configuration is inactive in the application. To access XeopleSign, update the 'XEOPLESIGN' Job Board configuration status as 'Active' in the Job Boards Master.’
-
To configure, click the Manage Configuration in Job Board Master and update your authorisation Status as ‘Active’ on the XeopleSign Job Board
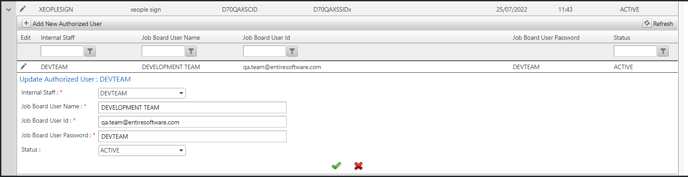
XeopleSign Authorised User
The Staff needs to add authorised users to access the XeopleSign Dashboard in the Entire OnHire application. The new authorised user details include:
- Internal Staff name - User Profile
- Job Board User Name - Type in name to match your user profile
- Job Board User Id - Your Email Id
- Job Board User Password - Your Password
- Status - Active
To access XeopleSign Dashboard, the Status of the authorised user should be Active.
XeopleSign Authorised User Validations
The XeopleSign Authorised User validations are placed to identify and fix the missing details to setup the XeopleSign Dashboard for the Authorised User. On clicking the XeopleSign Dashboard, an Alert message is displayed, read the message carefully and click ‘Manage Configuration in Job Board Master’ to setup XeopleSign for the Authorised User successfully.
Case 1
-
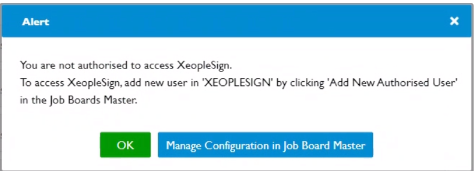
In case the user is not added in the Job Boards Masters, an Alert message is displayed as ‘You are not authorised to access XeopleSign. To access XeopleSign, add new user in 'XEOPLESIGN' by clicking 'Add New Authorised User' in the Job Boards Master.’
-
To configure, click the Manage Configuration in Job Board Master and add a user in the ‘XEOPLESIGN’ by clicking Add New Authorised User in the Job Boards Master
Case 2
-
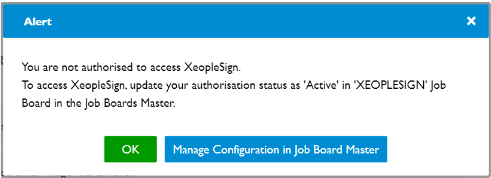
In case the Authorised User’s Status is set to inactive in the Job Boards Masters, an Alert message is displayed as ‘You are not authorised to access XeopleSign. To access XeopleSign, update your authorisation status as 'Active' in 'XEOPLESIGN' Job Board in the Job Boards Master.’
-
To configure, click the Manage Configuration in Job Board Master and update your authorisation status as ‘Active’ in the XeopleSign Job Board
Document Mapping
Document Mapping is a tool that facilitates to map the XeopleSign documents with the Entire OnHire documents. The mapped Entire OnHire documents are displayed as the Member documents on the Document page/ Training Details page/ Health Details page.
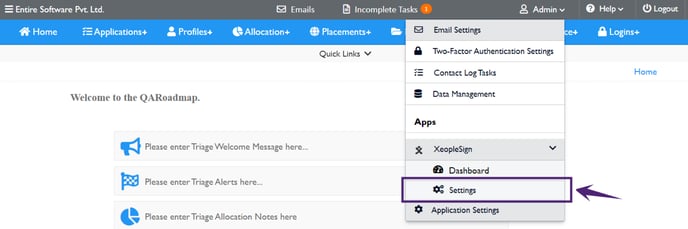
To access Document Mapping:
-
Click the XeopleSign collapse icon from the user login drop-down of the Entire OnHire application
-
Click Settings and the Document Mapping page opens
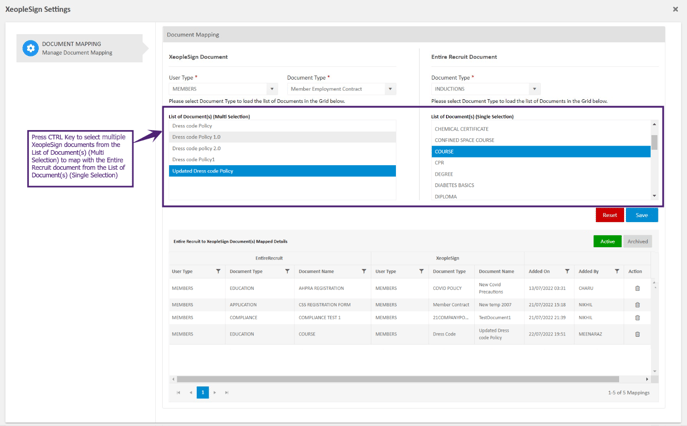
Document Mapping Process
In the Document Mapping process, the documents are mapped between XeopleSign and Entire OnHire. To map the documents:
-
In the XeopleSign Document:
-
Select the User Type as Member
-
Select the Document Type. The Document Type includes all the member documents in the XeopleSign database. On selecting the Document Type, the documents linked to the selected document type appear in the List of Document(s) (Multiple Selection)
-
Select document(s) from the List of Document(s) (Multiple Selection) that need to be mapped with the Entire OnHire document. To select the multiple documents, press the CTRL key and click to select multiple documents
-
In the List of Document(s) (Multiple Selection), the documents that are not already mapped with any Entire OnHire document are displayed.
-
In the Entire OnHire Document:
-
Select the Document Type. The Document Type includes all the member documents in the Entire OnHire database. On selecting the Document Type, the documents linked to the selected document type appear in the List of Document(s) (Single Selection)
-
Select the document from the List of Document(s) (Single Selection) that need to be mapped with the selected XeopleSign Document(s). Here, you can select any one of the documents available in the list of documents
-
-
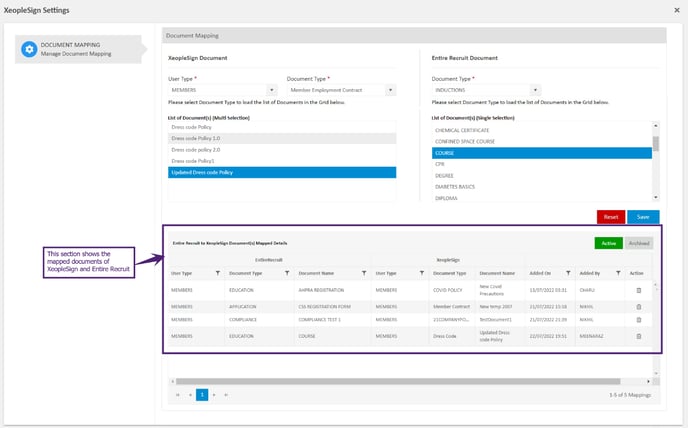
When the document(s) that needs to be mapped are selected from the XeopleSign (List of Document(s) (Multi Selection) and Entire OnHire (List of Document(s) (Single Selection), click Save and the mapped details are saved successfully and shown in the XeopleSign Document(s) to Entire OnHire Mapped Details section
-
In case multiple documents are selected from the XeopleSign for mapping with the single document selection for the Entire OnHire, each document is listed as a separate entry in the Entire OnHire to XeopleSign Document(s) Mapped Details section
-
To map another set of documents in the XeopleSign and Entire OnHire, click Reset
-
Now, the mapped documents are shown in the Active section of Entire OnHire to XeopleSign Document(s) Mapped Details
-
The Active section shows User Type, Document Type, Document Name, Added On, Added By, and Action for the XeopleSign and Entire OnHire documents
-
The Added On shows the document mapping date and time, Added By shows the user name who mapped the document, and Action shows the delete icon
-
In Action, on clicking the delete icon, the selected document is deleted and this deleted document is shown in the Archived section
-
The Archived section shows User Type, Document Type, Document Name, Deleted On, Deleted By, and Action for the XeopleSign and Entire OnHire documents
-
The Deleted On shows the document deletion date and time and Deleted By shows the user name who deleted the document
-
Mapped Member Documents in Entire OnHire
In the Entire OnHire Application, when the member completes the signing of the document (i.e. the XeopleSign document status is set as Completed), the mapped documents are reflected in the member’s Electronic Submission/ Storage of Employment Documents page as shown in the figure below.
Note the following cases for the mapped Member Documents in the Entire OnHire application:
All the cases explained below are applicable when the XeopleSign Document Status is Completed (i.e. the member has signed the document)
- Case 1: Both Health and Training Documents flags are set to 'No' in the Documents Master
In this case, both Health and Training documents are shown in the Documents section of the member corresponding to the mapped Entire OnHire Document Name
Note the XeopleSign Documents mapped with Entire OnHire Documents of Health and Training Document Type are not shown in case the Health and Training Documents flags are set to ‘Yes’ in the Documents Master
- Case 2: The Health Documents flag is set to 'Yes' and the Training Documents flag is set to 'No' in Documents Master
In this case, Health documents are shown in the Documents section of the member corresponding to the mapped Entire OnHire Document Name
-
Case 3: The Training Documents flag is set to 'Yes' and the Health Documents flag is set to 'No' in Documents Master
In this case, Training documents are shown in the Documents section of the member corresponding to the mapped Entire OnHire Document Name
Note that the Health and Training documents are mapped based on the Qualification of the member. Staff needs to ensure appropriate Qualification is selected for the member to map the documents successfully.
-
Case 4: If the ‘Allow to Override Documents' flag is set to ‘Yes' for any Document Type in the Documents Master
In this case, the documents are overridden if the document already exists on the document page and no approval process is required

Filters
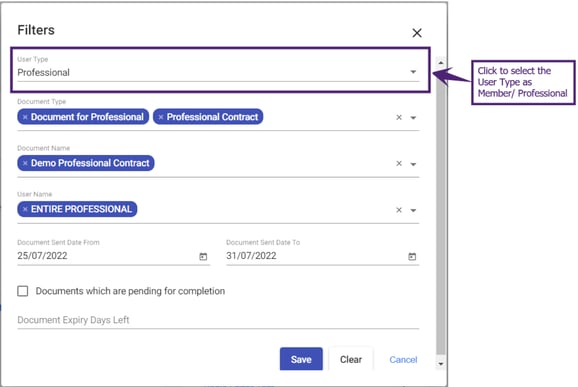
The Filters are used to retrieve specific documents from the Dashboard page and facilitate to narrow down the search of the particular documents for the users. The documents can be filtered based on User Type, Document Type, Document Name, User Name, and the date range of Documents Sent. The Filters set are saved for the logged-in User.
Now in Filters, User Type as Professional is added in the User Type drop-down. In Filters, based on the selected User Type i.e. Member/ Professional, the Document Type, Document Name, and User Name are fetched. For details about Filters, refer to ![]() XeopleSign Phase 1 Document.
XeopleSign Phase 1 Document.
User Documents
The User Documents page of the Professional/ Member shows the User Name, User Id (internal & external Ids), User Type, and current electronic documents of the user.
Note that now the User Documents are shown for professionals and members.

On clicking the Add New Document, the Document Type and Document Name are fetched based on the selected User Type. On selecting the Document Type for Professional or Member, the Document Name are fetched accordingly.
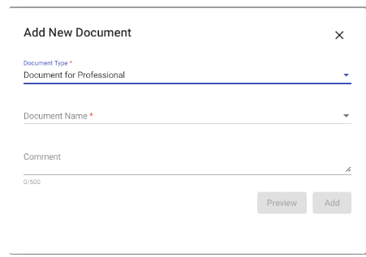
Add New Document Type
In Document Type master, you can add User Type as Professional or Member
-
On selecting the User Type as Professional, the New Document Type is added for the professional
-
On selecting the User Type as Member, the New Document Type is added for the member

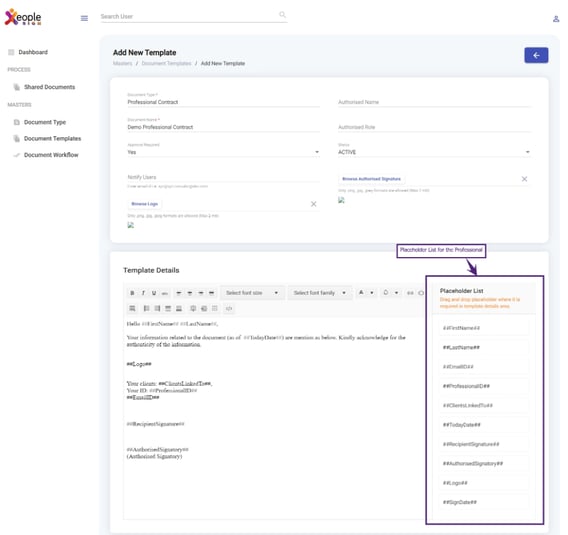
Add New Document Template
In the Add/ Edit Template page, the placeholders are listed in Template Details Section. This placeholder list is displayed based on the User Type i.e. Professional/ Member for the selected document type. In the Add/ Edit Template page:
-
If the Document Type selected is for the user type as ‘Member’, the placeholders of the member appear
-
If the Document Type selected is for the user type as ‘Professional’, the placeholders of the professional appear
Placeholder List Details for the Professional
|
Placeholder Name |
Description |
|---|---|
|
##FirstName## |
First Name of the professional. |
|
##LastName## |
Last Name of the professional. |
|
##EmailID## |
Email address of the professional. |
|
##ProfessionalID## |
Identification number of the professional. |
|
##ClientsLinkedTo## |
Details of Clients to which the professional is linked and the details include Client Name, Client Email ID, and Client Address |
|
##TodayDate## |
Current date. |
|
##RecipientSignature## |
Receiver’s signature. |
|
##AuthorisedSignatory## |
Authorised person’s signature. |
|
##Logo## |
Logo of the company. |
|
##SignDate## |
Adopt Signature Date. |
All the placeholder’s values will be fetched only when you assign this template to a professional except for ##TodayDate##, ##AuthorisedSignatory##, and ##Logo## placeholders.
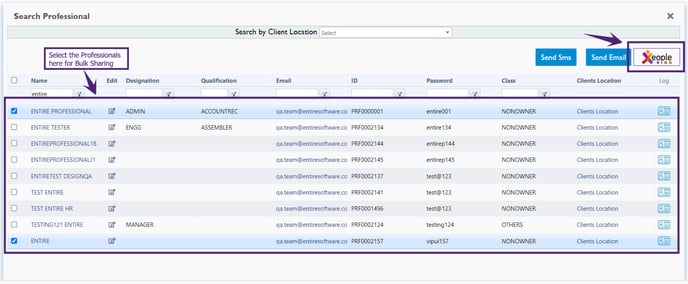
Bulk Sharing with Professional
To share the documents with the Professionals for e-signing, select the required Professionals from the Search Professional page and click the XeopleSign icon as shown in the figure below.
You should have a valid Email ID for the professional before sharing the document.
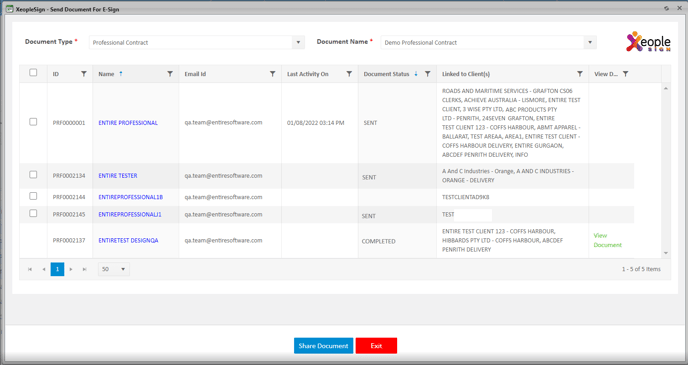
The Send Document For E-Sign pop-up window opens as shown in the figure below. Select the Document Type and Document Name of the professional from the drop-down box. The Send Document For E-Sign pop-up windows gets refreshed with the selected Document Type and Document Name.
The details shown include the Professional ID, Name of the Professional, Email Id of the Professional, Last Activity On (date and time of last activity), Document Status (current status of the document), Linked to Client(s) (shows names of the Client with whom the Professional is linked), and View Document link (pdf file link generated corresponding to the status).
You can view the selected user’s document by clicking the View Document link of the professional.
The View Document link is available for the document that has the Document Status as ‘Completed’, 'Declined', ‘Rejected’, and Withdrawn.
-
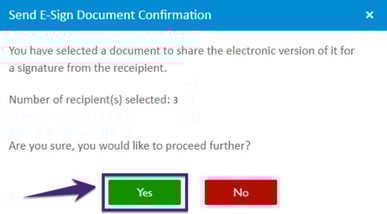
Select the professional by clicking the required checkbox(es) or to select all the professionals click the heading checkbox and click the Share Document. The Send E-Sign Document Confirmation pop-up window appears showing the number of recipients for the E-Sign document
-
You need to select the Document Type, Document Name, and Professional ID to Share Documents else an alert message is displayed
Note that all the documents will be selected except documents with the Document Status as ‘Completed’.
-
Click Yes and it may take a while to send the document to all the recipients
-
Finally, the ‘Document shared Successfully’ message will appear


View Professional Documents
Open the Search Professional page from the Entire OnHire application, and click the XeopleSign icon as shown in the figure above.
On clicking the XeopleSign icon for the selected professional, the User Documents page opens in the XeopleSign. The User Documents page of the professional shows the User Name, User Id (internal & external Ids), User Type, and current electronic documents of the user.

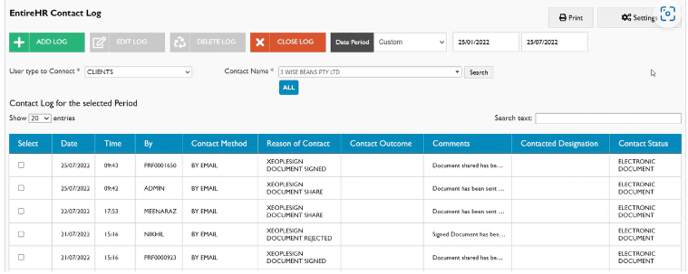
Contact Log
When the XeopleSign documents are sent for e-signing to Professional from the Staff Portal or XeopleSign application, the logs are created in the Contact Log against its Clients. If the professional is linked with multiple clients, the document logs are created against all the Clients to which the professional is linked.
This Contact Log maintains the detailed XeopleSign logs for a professional in the Staff Portal application. You can view XeopleSign contact logs with details in the comment section of the edit log.
To view the XeopleSign Contact Log for a member:
-
From the Staff portal, click Personnel Card quick link
-
Search the professional, click the View Log, and the Entire OnHire Contact Log page opens
-
This Entire OnHire Contact Log page displays the Date, Time, By, Contact Method, Reason of Contact, Contact Outcome, Comments, Contacted Designation, and Contact Status log details for a selected member
The professional can select any of the log detail and click Edit Log to view all the Comments. The Comments will show all the available contact log details for a selected professional ![]() .
.
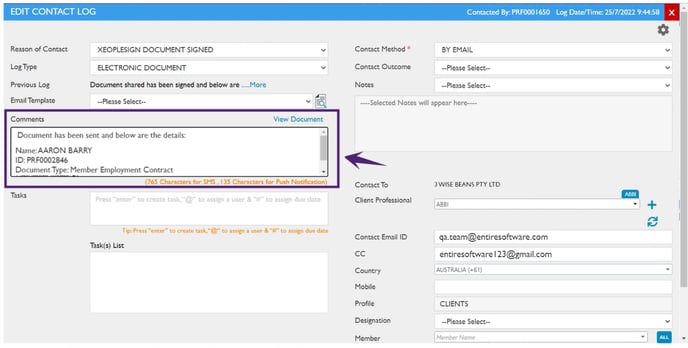
For instance, the figure below shows the Comments for 'XeopleSign Document Completed”. Scroll to view the details in comments such as Name, ID, Document Type, Document Name, Status, Document URL, Staff ID, and Staff Name for this contact log. You can also click the Document URL link to open the document.
Sample Comments for the ‘XeopleSign Document Completed’.
|
Document Shared has been Signed and below are the details: Name: AAROB BARRY |